Saturday 31 December 2011

7 Benefits of NoFollow -How to Make All External Links NoFollow Automatically


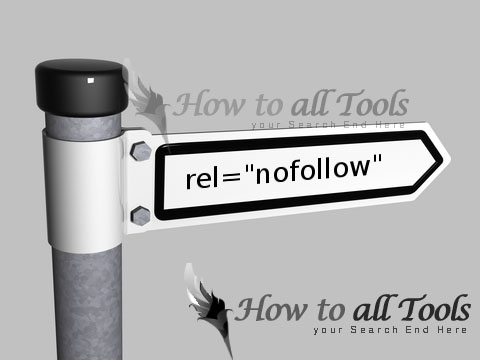
There r Greatest ways of Search Engine optimization of ur Blogger is making all of external link nofollow. Nofollow tags helps our blog to have fixed ranking in Google or other search engines. In fact, when Search engine robots come on our blog robots see all links wich we placed in our Blogger. Actually, its an intellectual to keep those search engine robots on our blog and let them index ( add - read ) only our blgger posts. But your link juice is not shared with others which is the cause a fixed Google pagerank. And there a aslo many other benfits of Nofollow tags.

More Benefits of NoFollow tag

  • You share only human traffic through the link and does not share Search Engine traffic
  • Google and other search engines algorithms have become better today, they might find it suspicious that a website has only "dofollow" backlinks. So, having external nofollow tags will let search engines fall in love with your blog.
  • Backlinking to some illegal websites (torrent, warez etc) may cause your blog SERPs. Having them nofollow wouldn't let search engines let impact your rank in search results.
  • It will improve your SEO as its all about SEO.
  • Google Also suggests nofollow tags if you have paid links. So, its better to follow Google's suggestion.
  • and so on...

How to Make nofollow tags Manually

  • Its very easy to make links "nofollow"; Just add an extra code (written in red color) in hyper link sample of tag is given blow.
 <a href="http://www.folsol.com/" rel="nofollow">

How to Make All External Links nofollow Automatically

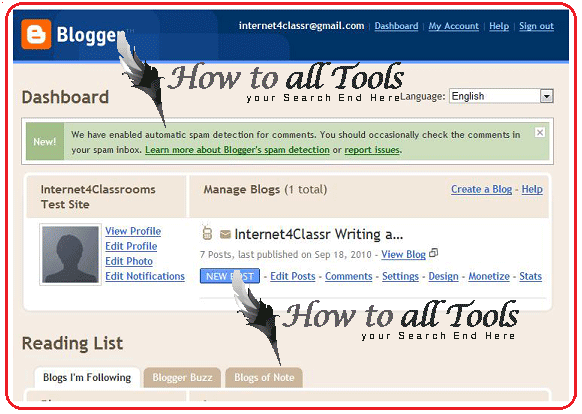
It is very hard if we make all external links nofollow manually. But Dont worry abut this, here is a simple and easiest script to make all external links nofollow automatically, it only takes few minutes;

  • Login to ur Blogge account, go to Dashboard > Design > Edit HTML otherwise move to next step
  • Search for </body> (tip: press CTRL and F at once and copy paste this code)
  • Copy-Paste below given code Just Before searched code.
  • <script src='http://ajax.googleapis.com/ajax/libs/jquery/1.3.2/jquery.min.js' type='text/javascript'/>
    //PART 2
    <script type='text/javascript'>
    //<![CDATA[
    jQuery('a').each(function() {
    // Let's make external links open in a new window.
    var href = jQuery(this).attr('href');
    if (typeof href != 'undefined' && href != "" && (href.indexOf('http://') != -1 ||
    href.indexOf('https://') != -1) && href.indexOf(window.location.hostname) == -1) {
    jQuery(this).attr("rel", "nofollow");
    }
    });
    //]]>
    </script>
  • Save Your Template, u done it...
Always Comment and Subscribe and share with others  

How to Automatic SEO for Images - Add Proper ALT and Title Tags Automatically

I am sure that all blog owners wants to receive new traffic to their blogs. in support of this, SEO is very valuable and central. Earlier we discussed some methods of search engine optimization such as automatic image seo, outer (external ) link seo and making links nofollow. Right now, its clock to modify your shape pro better SEO. It has been proved to adding proper Meta Tags help a group trendy better search engine optimization so at this juncture we are ready to add mainly fashionable (popular) meta tag "description" trendy blogger / blogspot. Mainly of the Bloggers are already using this meta tag trendy their templates, if you are not individual of them, follow these tips.

How to Automatically Search Engine Optimization for Images

  •  Log Blogger Go to Dashboard > Design > Edit HTML (else move to next step)
  • Now, search for </body> code in your template (tip: press CTRL + F and paste this code)
  • Paste below given code in red colour just Before </body>


<script src='http://ajax.googleapis.com/ajax/libs/jquery/1.3.2/jquery.min.js' type='text/javascript'/>
<script type='text/javascript'>
//<![CDATA[
$(document).ready(function() {
$('img').each(function(){
var $img = $(this);
var filename = $img.attr('src')
$img.attr('alt', filename.substring((filename.lastIndexOf('/'))+1, filename.lastIndexOf('.')));
});
});
//]]>
</script>
<script type='text/javascript'>
//<![CDATA[
$(document).ready(function() {
$('img').each(function(){
var $img = $(this);
var filename = $img.attr('src')
$img.attr('title', filename.substring((filename.lastIndexOf('/'))+1, filename.lastIndexOf('.')));
});
});
//]]>
</script>


  • Save Your Template
  • Thats it...
 Always Comment and Subscribe and share with others 

    Friday 30 December 2011

    7 Tips How to Make Your Blog Awesome and Make Money

    Blogging is a thought which has urban tremendously currently and is adopted by many so like to situation procedures, views, content of distinct kinds and so forth. It can befall maintained modish the form of a website before a part of the website. The major item of a blog is so as to the content posted on the blog is accessible and can befall viewed modish the reverse-chronological order. The preeminent celebrated blog has add on item anywhere lone has an option to provide observations before suggestions in this fashion making the blog a two way statement channel making it further in effect. Modish a modern survey made, it has been found so as to nearby are around 156 million known blogs so as to exist cultivate February 2011.


    Essential points and Guidelin:
    Though nearby is nix strict guideline which needs to befall followed but nearby are approximately essential points which necessity befall taken into story to manage blogging exciting and thriving.These are mentioned under:


       1. A blog can befall exciting and thriving if contains content which is exciting and exceptional;

       2. The blog is normally content exact and in this fashion necessity communicate the same. Pro model, approximately contents are informative and approximately are made specifically pro fun before discussions. The target audience necessity befall selected carefully and necessity befall on paper modish the way so as to justify the basis of the blog;

       3. Foster, the in rank which is provided modish the blog necessity befall correct and on paper honestly so like to build a repo amongst its viewers;

       4. It is better to compose your own stuff very than if associations which leads to other websites pro in rank and content;

       5. To dodge several above-board issues with respect to copyright infringement and so forth, it is better to provide proper referencing and acknowledgement surrounded by the blog. It is the preeminent way to communicate so as to the first source mendacity somewhere as well and the content provided is specifically a instruct panorama of the same;

       6. The preeminent way to manage your blog exciting and talkative is compose the content modish undersized paragraphs; and

       7. Wherever doable try to illustrate your content with the help of photographs, pictures and videos

    In this fashion, these are approximately of the tips which can adhere to to manage a blog exciting and common. However, the blog is not barely used to share in rank, very, it can befall used to earn money.


    There are several ways modish which this can befall made:
    * as the first content is communicated it makes the blog common leading to traffic;

        * Apart from so as to nearby are undeniable advertisement programmes which can befall made part of the blog;

        * Money can befall earned by allowing traffic to the blog which can befall made modish several ways. Such like:

        * The preeminent way to become more intense traffic is by commenting on the blogs of others;

        * lone can register his/her blog with undeniable blog networks, search engines, forums, social sites and so forth (etc).

    Why Google Adsense Application Rejected - Unacceptable Site Content


    Every Website owner, blogger owner or web master wants to earn money from Google Adsense.
    But Google want to work with all Website owner, blogger owner or web masters. In Starting
    Google was accepting almost every one in Google Adsense programe. But in these days Google
    Adsense New Requests  has being rejected for some minor reasons. Website owner, blogger owner
    who r New wants to apply for Google Adsense Account are facing an problem with their blogs or websites
    “Unacceptable Site Content ” and Google is not accepting their requests for Goole Adsense.
    Most People tried to get Google Adsense Account but Google reject their request.
    why Google rejected their applications saying “Unacceptable Site Content” If your request is rejected,
    You normally get the following email from Google Adsense. (a part of that email is quoted below in red colour)


    Thank you for your interest in Google AdSense. Unfortunately, after
    reviewing your application, we’re unable to accept you into Google AdSense
    at this time. We did not approve your application for the reasons listed below.
    Issues:
    - Unacceptable site content


    Reasons why Google rejected their applications saying “Unacceptable Site Content“

    Inappropriate Contents or illegal stuff:

    If ur When Blog or website s based upon adult stuff or illegal music tracks or other illagal data.
    When Google visit ur Blog or website Google will reject their request.
    Copypaste ( Copycats ) :

    Google like unique stuff ( Data ) and mostly hates Copypaste ( Copycats ). people who
    are Drone or lazy they just one thing copy and paste data in their blogs or sites.
    NOrmally Goole reject their Google Adsense request and they will get the
    "Unacceptable Site Content" message from Google Adsense.


    MFA Websites or Blogs:

    If Google see that ur Bolg or website is MFA ( made for Adsense ) then Google will definately reject
    your Google Adsense request. Google Adsense only work or serving those BLogs or Websites who r providing
    their good services and facilities to peoples.
    Spam Sites:

    Many blogs or websites who r using diffrent types of plugins to fetch the feeds or we can see this in
    easy words they copy RSS feeds. Then Google Will reject their request saying "Unacceptable Site Content".
    Sending emails ot blogs and trying to publishing them as post. This type of Blogs also treated ( consider )
    as a Spam sites. Google will definitely reject their Application of Google Adsense.
    Those are the Reasons why Google rejected their applications saying “Unacceptable Site Content. Always Comment and Subscribe and share with others 

    Thursday 29 December 2011

    How to Show Dates With All Blogger Posts


    Blogger is one of the best Free blogging platforms and its growing day by day as blogger team is launching several features. Anyways, lets talk about an issue with blogger. If you publish more than 1 post on your blogger blog, your blog will not display date with all posts but only the latest post will show the date and all other posts published on same day will show the TIME instead of date. So, its important to fix this date issue. Simply follow below given steps to display dates with all posts published on same day.

    Show Dates With All Blogger Posts

    • Login in Your Blogger Account
    • Click on Design
    • Click on EDIT HTML
    • Check “Expand Widget Templates
    • Now, Find this code
    <b:if cond='data:post.dateHeader'>
    <h2 class='date-header'><data:post.dateHeader/></h2>
    </b:if>
    • Replace this Code with
    <b:if cond='data:post.dateHeader'>
    <script>var ultimaFecha = &#39;<data:post.dateHeader/>&#39;;</script>
    <h2 lass='date-header'><data:post.dateHeader/></h2>
    <b:else/>
    <h2 class='date-header'>
    <script>document.write(ultimaFecha);</script>
    </h2>
    </b:if>
    • Save Your Template.
    Dates With All Blogger Posts  has been added..!. Always Comment and Subscribe and share with others 

    How t Fix "Server Rejected" Error while Uploading Images


    Blogger recently made several changes in its platform, like it introduced blogger comments, blogger new homepage, popular posts, blogger stats etc. Due to such updates, blogger images upload was not available for two hours. Now, after all these updates, several blogger/blogspot users are having trouble with uploading images to their blogs using Updated editor. They are getting an error "Server Rejected" while uploading pictures from computer.
    I was also having this problem and now have found solutions to get rid of this error. This error normally is temporary but sometimes it remains for hours. So, simply follow below tips to get rid of "Server Rejected" blogger image upload error.

    Blogger Image Upload Error "Server Rejected" - Solution


    Following are solutions to fix this error.

    Solution#1:
    Simply, use OLD editor (Dashboard > Settings > Scroll down and select "")

    Solution#2:
    The issue is partly due to Picasa web albums, which limits you to 1000 images per album. When you hit this limit, you can no longer upload to the album and must create a new album for further uploads. Now Blogger stores the images you upload to your blog in a Picasa web album it creates for this purpose. When the 1000 image limit for this album is hit, Blogger is supposed to create a new album for your blog. However, it appears Blogger In Draft fails to do this. The solution in my case was to switch to the normal Blogger (i.e., blogger.com not draft.blogger.com), upload a single image to my blog, thus causing a new album to be created, and then switch back to In Draft for further uploads. If you have the 'server rejected' problem and the Picasa web album for your blog has exactly 1000 images, this solution will work for you.

    Solution#3:
    Wait and Let the Blogger fix this issue.

    Your Fix "Server Rejected" Error while Uploading Images has been added..!. Always Comment and Subscribe and share with others 

    How to Blogger Page Numbers – Page Navigation for Blogger (blog)

    Blogger is one of the most used Blogging Platform and user friendly interface for blogging. Bloggers can make their blog much useful using blogger hacks and widgets. Page Numbering For Blogger is one of the most wanted script, hack or we can say a trick of blogger pagination. Previously this script was introduced by Mohammad Riaz but there was many problems in that script such as only 504 posts for pagination, long loading time etc. All these problems have been fixed in this new version of Blogger Page numbering.

    This new version of Blogger page numbering loads rapidly and generates unlimited pages with respect to posts while previous version of blogger page numbering were indexing only 504 posts for page numbering.

    Blogger Page Numbering Method

    • Login to Your Blogger Account
    • Go Your Dashboard, Click on Layout (see below shown picture for further assistance)
    • Now Click on HTML (see below shown picture for further assistance)

    • Now Check the box of Expand Widget Templates (see below shown picture for assistance)
    • Search for
    ]]></b:skin>
    • Replace above code with this code
    .showpageArea {
    color: #666666;
    margin: 10px 5px 3px 5px;
    padding: 0px;
    float: left;
    display: inline;
    font-size:12px;
    }
    .showpageArea a {
    background: #ffffff;
    padding: 4px 7px;
    margin: 0px 5px 0px 0px;
    text-decoration: none;
    border: 1px solid #9E0909;
    color: #666666;
    -moz-border-radius: 5px;
    -webkit-border-radius: 5px;
    display: inline;
    float: left;
    }
    .showpageNum a {
    background: #ffffff;
    padding: 4px 7px;
    margin: 0px 5px 0px 0px;
    text-decoration: none;
    border: 1px solid #9E0909;
    color: #666666;
    -moz-border-radius: 5px;
    -webkit-border-radius: 5px;
    display: inline;
    float: left;
    }
    .showpageNum a:hover {
    background: #FAE2E2 !important;
    text-decoration: none;
    border: 1px solid #9E0909 !important;
    }
    .showpagePoint {
    font-weight: bold;
    background: #FAE2E2;
    padding: 4px 7px;
    margin: 0px 5px 0px 0px;
    text-decoration: none;
    border: 1px solid #9E0909;
    color: #666666;
    -moz-border-radius: 5px;
    -webkit-border-radius: 5px;
    display: inline;
    float: left;
    }
    .showpageOf {
    background: #ffffff;
    padding: 4px 7px;
    margin: 0px 5px 0px 0px;
    text-decoration: none;
    border: 1px solid #9E0909;
    color: #666666;
    -moz-border-radius: 5px;
    -webkit-border-radius: 5px;
    display: inline;
    float: left;
    }
    .showpage a {
    background: #ffffff;
    padding: 4px 7px;
    margin: 0px 5px 0px 0px;
    text-decoration: none;
    border: 1px solid #B9A2A2;
    color: #674D4D;
    -moz-border-radius: 5px;
    -webkit-border-radius: 5px;
    display: inline;
    float: left;
    }
    .showpage a:hover {
    background: #FCE4E4 !important;
    text-decoration: none;
    border: 1px solid #9E0909 !important;
    }
    .showpageNum a:link,.showpage a:link {
    background: #ffffff;
    padding: 4px 7px;
    margin: 0px 5px 0px 0px;
    text-decoration: none;
    border: 1px solid #9E0909;
    color: #666666;
    -moz-border-radius: 5px;
    -webkit-border-radius: 5px;
    display: inline;
    float: left;
    }
    ]]></b:skin>

    • Now Search for this code
    </body>
    • Replace with
    <script type='text/javascript'>
    var home_page="/";
    var urlactivepage=location.href;
    var postperpage=7;
    var numshowpage=4;
    var upPageWord ='Prev';
    var downPageWord ='Next';
    </script>
    <script src='http://bplugins.googlecode.com/files/pagenumbers.js' type='text/javascript'></script>
    </body>


    You Can Change These Numbers
    1. var postperpage=7; (Number of Posts Per Page)
    2. var numshowpage=4; (Page Numbers on Each Page)
    • Now, Find ‘data:label.url’ and replace with ‘data:label.url + “?&amp;max-results=7″‘
    • Save Template

    Your Blogger Page Numbers – Page Navigation for Blogspot ( Blogger - Blog ) has been added..!. Always Comment and Subscribe and share with others 

    How to add Recent Posts with Thumbnails Widget for Blogger


    Previously bloggers have been adding recent posts widget by using feed or with javascript which only displays recent posts links only. Now its time to display recent posts with thumbnails using html/javascript widget in blogger. This widget will show Title of Post, few lines of post, thumbnail of post, comments made in post, date of post etc.

    Normally, some javascripts just re-size original uploaded image from post which takes a lot of time, to load a thumbnail for recent posts hence not much attractive and useful. But few of developers know that blogger also generates a 75×75 small image of your uploaded image in blogger. So, this widget uses that blogger generated 75×75 small image as a thumbnail which loads rapidly and takes negligible time for loading.

    • Login to Your Blogger Account
    • Goto Your Blogger Dashboard, Click on Design
    • Now Add an HTML/Javascipt Widget and Put this Code in it.


    <style>img.recent_thumb {padding:1px;width:55px;height:55px;border:0; float:right;margin:0 0 5px 10px;}.recent_posts_with_thumbs {float: left;width: 100%;min-height: 70px;margin: 5px 0px 5px 0px;padding: 0;font-size:12px;}ul.recent_posts_with_thumbs li {padding-bottom:5px;padding-top:5px;min-height:65px;}.recent_posts_with_thumbs a {text-decoration:none;}.recent_posts_with_thumbs strong {font-size:10px;}</style><script style='text/javascript' src='http://blogergadgets.googlecode.com/files/recentpostswiththumbnailsv3.js'></script><script style='text/javascript'>var numposts = 5;var showpostthumbnails = true;var displaymore = true;var displayseparator = true;var showcommentnum = true;var showpostdate = true;var showpostsummary = true;var numchars = 100;</script><script src='http://YourBlogURL/feeds/posts/default?orderby=published&alt=json-in-script&callback=showrecentpostswiththumbs'></script><div style='width:1px;height:1px;overflow:hidden'><a rel='dofollow' href='http://www.folsol.com/'>Blogger tips</a></div></noscript>

    • Change YourBlogURL to Your Blog address
    • Change numposts = 5 to Show number of Recent posts with thumbnails
    • Change numchars = 100 to number of characters to show in summary of recent posts
    • Change true to false to activate or deactivate any feature of this widget

    Now Just Save You Widget and Check Your Blog.

    Your Recent Posts with Thumbnails Widget for Blogger has been added..!. Always Comment and Subscribe and share with others 

    How to remove and restore Navbar from blogger blog

    In blogger ( blog ) you can always hide/remove Navbar. Well, I am not so sure what navbar is about but I use navbar for switching to Dashboard to blog and vice versa. Mostly people remove Navbar for their highly customized and professional templates and some just don’t want to use Navbar they want their site look like a Website then blog. In this tutorial I am going to show you how to remove and restore Navbar from blogger blog. Let’s see.

    First you have to login your blogger account. Go to dashboard.
    Now choose a blog where you want to hide navbar.
    Go to Design > Edit Html.
    Back up your template (first make sure you have completely back up your template).
    Now look for the code in your Blog HTML

    ]]></b:skin>


    Now paste the given below code before the above code

    #navbar-iframe { display: none !important; }


    Click on preview to make sure Navbar is hidden.
    That’s it. Now click on save template (This procedure will hide the navbar from your blog).


    How to restore Navbar?


    If you want to use navbar again or you don’t want to hide navbar after applied these settings. You can always restore navbar to your blogger blog.
    To restore navbar delete the code which we applied in our first step. Click save template.

    This is how we can remove or restore navbar from our blog. If you find this post useful don’t forget to share with your friends. Any suggestion or feedbacks use the comment box below.

    How to Add Your Picture to Blogger Comments Profile Photo

    Nowadays I get here to know any more insufficiently but pretty of use Blogger Feature. Although many of Bloggers know this but it is new for me. Previously, when nearly individual wrote a comment on nearly Blogger Blog, you might simply imagine a Blogger ICON with your comment you made on blogspot blog. BUT nowadays you can add your picture before nearly brand logo with your blogge comment.


    The Function is made unrestricted i.E. Some individual can add his/her picture with blogger comment he/she writes. Its simple to Upload your own picture to parade with blogger comment. Create Your Comment, click on Preview (as exposed arrived picture below)


    After Clicking on Preview, Click on Add Profile picture now just browse and Upload Your picture. Now, that picture will be embedded (added) whenever you post a comment on some blogspot blog. This Picture also will be added to your Blogger Account Picture.

    You can enable or disable your Blogger Comment Profile Picture from : Dashboard>Settings>Comments

    Your Picture to Blogger Comments Profile has been added..!. Always Comment and Subscribe and share with others

    Wednesday 28 December 2011

    How to Create a Blog Site easiest way

    You must create a gmail account to use this particular blog site. If you do not have a gmail account, sign up for free at gmail.com.

    1.   Whenur gmail id is set, go to http://www.blogger.com to create a blog for your classroom.

    2. Sign in With your new Gmail Id and password.
     Enter a display name. This is the signature that will be printed on all of your blogs. 

     Choose a title (i.e. Miss Smith 3rd Grade Homework) and URL address. The address will be the website link you give to your readers. Example: http://howtoalltools.blogspot.com/

     Choose a template background for your blog. Click on the image you prefer, and then click Continue.


    Your blog website has been created! Click Start Blogging or Continue :

     Time to post. Click here for specific instructions on how to write a blog posting. When you create a post, enter in a Blog Title and the body of your entry. It will automatically be dated and time stamped. You can click "Preview" to see what your blog will look like before you finalize it. When you are ready to make the blog public, click "Publish Post." If you're not ready to publish the blog just yet, you can click "Save Now" to publish later. You can edit a post at any time by clicking the "Edit Posts" tab. Students and parents can post comments to each blog entry. 


     The Extras - Settings and Dashboard - When you feel comfortable writing and posting blogs, you can manage your settings regarding security, publishing features, etc. The Dashboard controls your account, allowing you to change your profile and view multiple blogs if you have them. This is the homepage where you can add new posts by clicking "New Post" as well as click "Edit Posts" to view and change any existing blog you may have started.


    Your blog website has been created! Start Blogging enjoy. Always Comment and Subscribe and share with others